All, Keg coupler
What is Keg Coupler: A Complete guide

What is a Keg Coupler?
Introduction
Hey there! So you’ve got your very own kegerator in your home bar or man cave, huh? That’s awesome! Now, let’s talk about one of the most important parts of your kegerator – the keg coupler.
It is a special key that unlocks the deliciousness of your beer. It attaches to the valve on the keg and to a CO2 compressed gas line. This allows the compressed air to enter the keg and push out the beer. It’s like magic!
Types
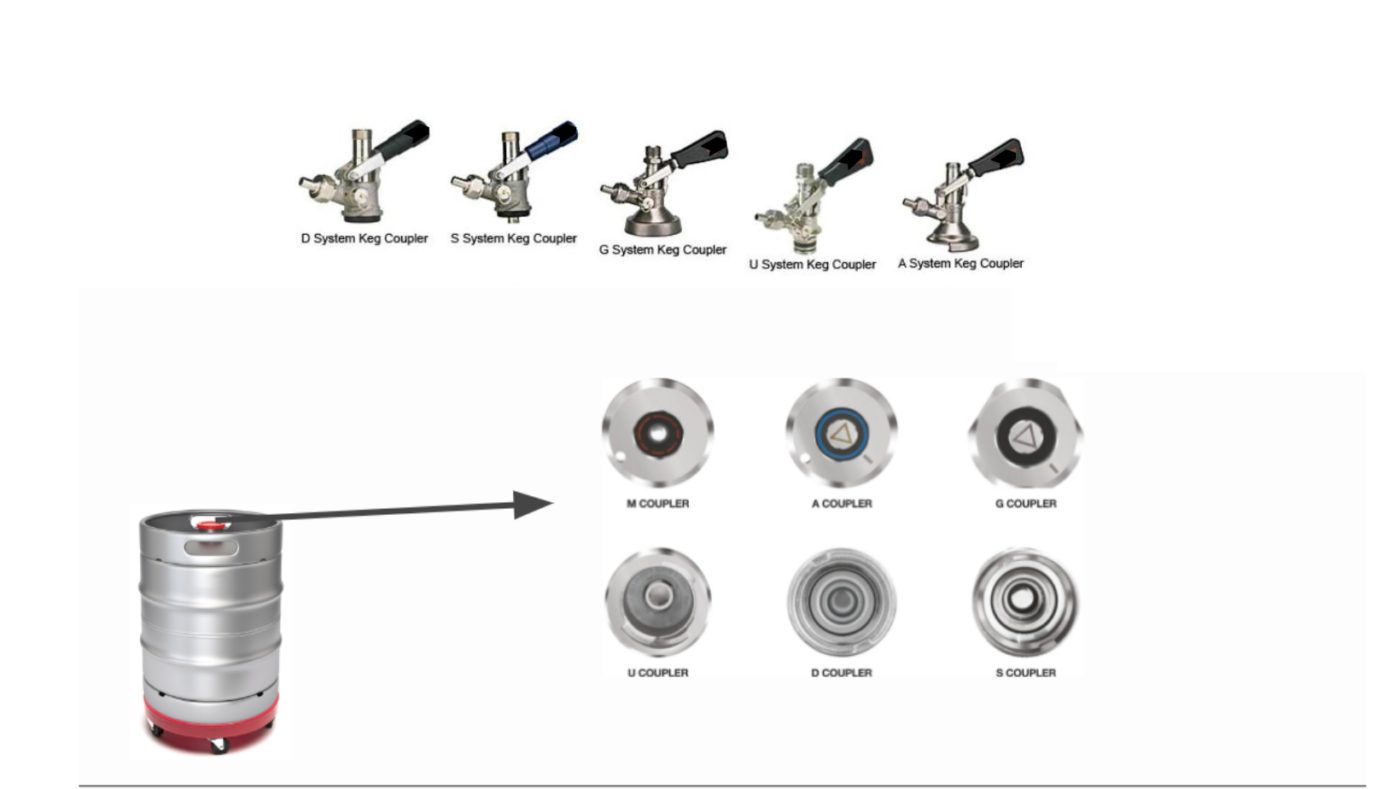
Now, here’s where it gets a little tricky. Depending on the type of beer you have in your kegerator, you might need a different type of coupler to serve it correctly. There are six different types of keg couplers, and each one fits a specific kind of keg valve.
D Coupler
This coupler fits U.S. Sankey Keg Valves.
A Coupler
This coupler fits most German Keg Valves.
G Coupler
This coupler fits some European Keg Valves.
M Coupler
This coupler fits some German Keg Valves.
S Coupler
This coupler fits European Sankey Keg Valves.
U Coupler
This coupler fits some European Keg Valves.
So, to make sure your beer is served properly, you need to know the brand/style of beer, where it was brewed, and the size of the keg. This will help you choose the correct coupler that fits the valve on the keg.
Components and Working Mechanism:
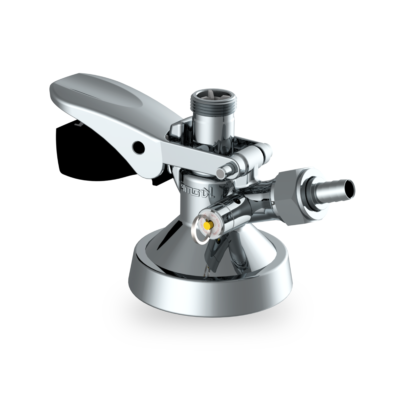
It is consist of various components, including the probe, handle, pressure relief valve, and check valve. The probe is inserted into the valve’s opening, piercing the keg’s diptube, which extends to the bottom of the container. Its handle, often ergonomically designed, engages the keg’s valve, securing the coupler firmly in place. The pressure relief valve ensures that excess pressure is released to prevent over-pressurization and maintain optimal keg conditions. Furthermore, the check valve permits the flow of beer when the tap is opened but prevents beer from flowing back into the keg when the tap is closed.
How to Install:-
Installing your keg coupler is easier than you might think! Here’s a step-by-step guide:
- Attach the CO2 regulator to the CO2 cylinder. Make sure the cylinder is filled and the valve is closed.
- Securely pair up the regulator to the CO2 cylinder.
- Attach the gas line to the “gas out” port on the regulator and secure it with a clamp.
- Attach the other end of the gas line to the “gas in” port on the coupler.
- Attach the beer line to the liquid out port on the coupler.
- Connect the coupler to the keg by turning it clockwise 25°.
- Push down the handle of the coupler into the keg valve to lock it in place.
- Turn on the CO2 cylinder slowly and you’ll hear gas flowing into the keg.
- Release some gas through the pressure relief valve to get an accurate reading on the pressure gauge.
- Adjust the regulator to the recommended serving pressure for your beer.
- Now, you’re ready to serve your own draft beer! Cheers!
Conclusion
So there you have it is like a special key that unlocks the deliciousness of your beer. Make sure to choose the right coupler for your keg, and follow the installation steps to enjoy a perfectly chilled and refreshing draft beer in the comfort of your home. Cheers to that!

